How to Embed an AI Chatbot into WordPress Without Plugins (Step-by-Step Guide)
Build a production-ready AI chatbot for WordPress using iframe embedding—without plugins, better performance, and easier maintenance.
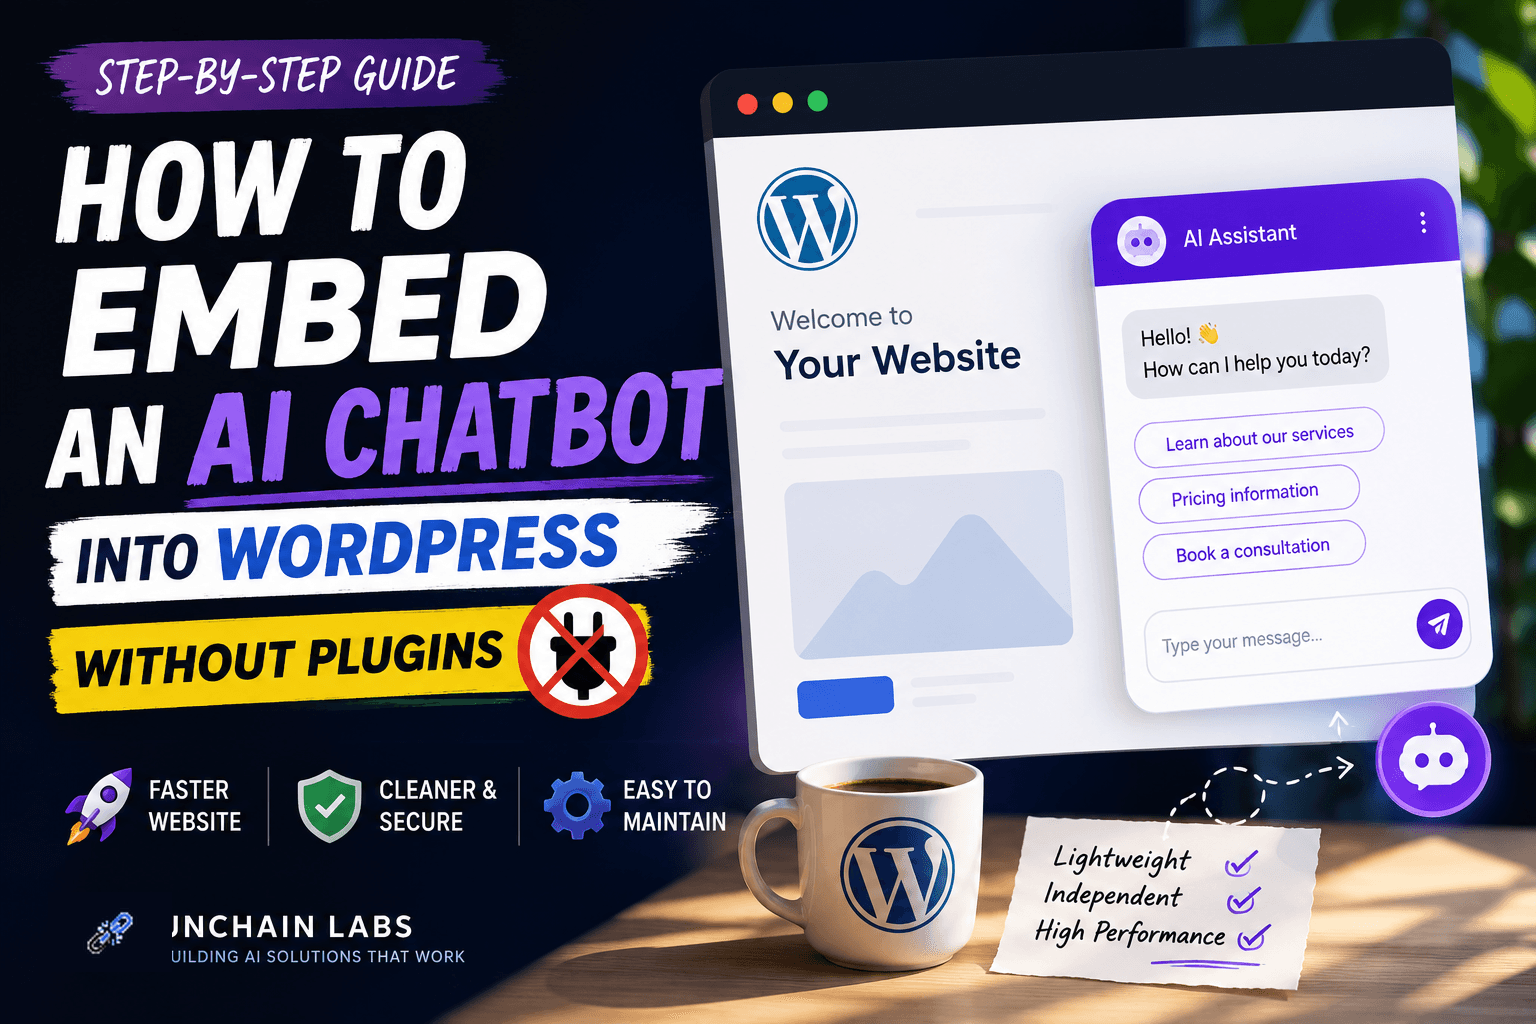
Learn how to embed an AI chatbot into WordPress without plugins using iframe embedding. Improve performance, simplify maintenance, and build a scalable AI integration with this step-by-step guide.
How to Embed an AI Chatbot into WordPress Without Plugins (Step-by-Step Guide)
Most WordPress AI chatbot tutorials recommend installing another plugin. While this may seem like the quickest solution, it often introduces unnecessary complexity over time. Each additional plugin increases your website's dependency chain, potentially affecting performance, creating compatibility issues after WordPress updates, and adding another component that requires ongoing maintenance.
A more scalable approach is to keep your AI chatbot completely independent from WordPress.
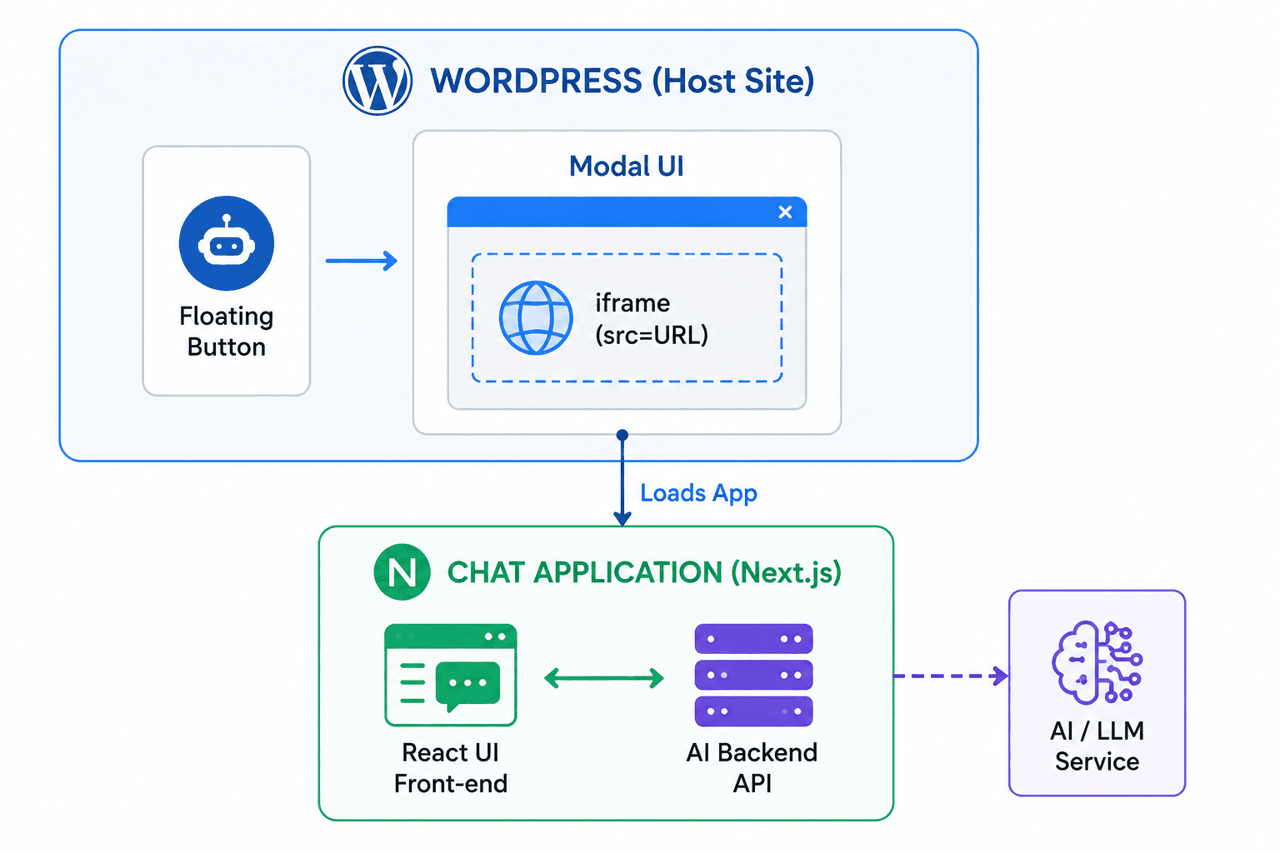
Instead of embedding AI logic directly into your theme or relying on third-party plugins, you can deploy the chatbot as a standalone web application and embed it into your website using an iframe. This architecture keeps your WordPress installation lightweight while allowing your AI application to evolve independently.
In this step-by-step guide, you'll learn how to embed a production-ready AI chatbot into WordPress without using any plugin, resulting in a faster, cleaner, and more maintainable architecture.
Why Avoid WordPress Chatbot Plugins?
Although WordPress plugins make chatbot installation easy, they're not always the best choice for production environments.
Using an iframe-based architecture offers several advantages:
- Better performance by avoiding unnecessary plugin overhead.
- Fewer compatibility issues when WordPress, themes, or other plugins are updated.
- Independent deployments, allowing your AI application to be updated without modifying your WordPress site.
- Simpler maintenance with a clear separation between the CMS and the AI system.
- Greater flexibility to switch AI models, prompts, or backend services without touching WordPress.
For businesses planning to continuously improve their AI assistants, a decoupled architecture is often the more scalable long-term solution
High-Level Architecture Diagram
Prerequisites
FTP/SFTP Credentials: Hostname, Username, Password, and Port (21 or 22) from your hosting provider.
FTP Client Software: FileZilla (or WinSCP, Cyberduck).
Chatbot URL: The live URL of your independently deployed chat application (e.g., [https://your-chat-app.com/chat](https://your-chat-app.com/chat)).
Avatar Image: An image file in .jpg or .png format, recommended size 200×200px, file size < 50KB to use as the floating chat button.
Step 1 — Connect to WordPress Hosting via FileZilla
Download and install the open-source FileZilla Client from the official website: Download FileZilla Client for Windows (64bit x86)
Open FileZilla Client.
Go to File → Site Manager (or press Ctrl+S / Cmd+S).
Click New Site and enter your connection details:
Protocol: Select SFTP (recommended) or FTP.
Host: Enter the IP address or FTP domain (e.g., ftp.yourdomain.com).
Port: Enter 22 (for SFTP) or 21 (for FTP).
Logon Type: Select Normal.
User & Password: Enter your assigned FTP account credentials.
Click Connect.
In the right panel (Remote site), navigate to your active theme directory using the following path:
Plaintext
/public_html/wp-content/themes/[your-active-theme-name]/
Step 2 — Backup functions.php and footer.php Files
In the right panel (Remote site) of FileZilla, locate the functions.php and footer.php files.
Right-click on each file → Select Download to save them to your computer (left panel - Local site).
Rename the downloaded files on your computer to functions.php.backup and footer.php.backup for safe keeping.
Step 3 — Verify and Insert the wp_footer() Function into the Theme
The wp_footer() function is mandatory for WordPress to successfully inject the widget code from the functions.php file into the bottom of your pages. If your theme is custom-built or missing this function, the widget will not display.
Open the downloaded footer.php file on your local machine using a code editor (e.g., Notepad++, VS Code).
Search for the keyword wp_footer().
If it is missing, insert the following PHP code right before the closing </body> tag:
PHP
<?php wp_footer(); ?>
Save the file and drag-and-drop it via FileZilla to overwrite the existing footer.php file on the server.
Step 4 — Create Directory and Upload the Avatar Image to the Server
In the right panel of FileZilla, right-click inside your active theme folder → Select Create directory to create a new folder path: assets/images/ai/.
Navigate inside the newly created ai/ folder.
From the left panel (Local site), drag and drop your avatar image file (e.g., cas-ai.jpg) into the right panel to upload it.
Verify the image link by accessing it directly in your browser:
Plaintext
https://yourdomain.com/wp-content/themes/[your-active-theme-name]/assets/images/ai/cas-ai.jpg
(If the image displays properly, it is successful).
Step 5 — Append the Chat Widget Source Code to functions.php
Open the local functions.php file on your computer using your code editor.
Scroll to the very bottom of the file and paste the following code snippet:
PHP


<?php
/**
 * Inject AI Chatbot Widget into wp_footer
 */
add_action('wp_footer', function () {
    $theme_url = get_template_directory_uri();
    // Replace the placeholder URL below with your live Chatbot application URL
    $chatbot_url = 'https://your-chat-app.com/chat';
    ?>
    <!-- 1. HTML CHAT WIDGET -->
    <button class="ai-float-button" id="ai-float-button" aria-label="Open AI Chat">
        <span class="ai-float-button-tooltip">Chat with AI Assistant</span>
        <div class="ai-float-button-wrapper">
            <img src="<?php echo esc_url($theme_url); ?>/assets/images/ai/cas-ai.jpg" alt="AI Assistant" loading="lazy" />
        </div>
    </button>
    <div class="ai-chat-modal" id="ai-chat-modal">
        <div class="ai-chat-modal-overlay" id="ai-chat-overlay"></div>
        <div class="ai-chat-modal-container">
            <div class="ai-chat-modal-header">
                <h3>AI Assistant</h3>
                <div class="ai-chat-modal-header-actions">
                    <button class="ai-chat-expand" id="ai-chat-expand" aria-label="Expand">⤢</button>
                    <button class="ai-chat-close" id="ai-chat-close" aria-label="Close">×</button>
                </div>
            </div>
            <div class="ai-chat-modal-body">
                <iframe
                    id="ai-chat-iframe"
                    src="<?php echo esc_url($chatbot_url); ?>"
                    frameborder="0"
                    allow="microphone; camera"
                    loading="lazy"
                    title="AI Assistant"
                ></iframe>
            </div>
        </div>
    </div>
    <!-- 2. CSS STYLES -->
    <style>
        .ai-float-button {
            position: fixed;
            bottom: 20px;
            right: 20px;
            width: 60px;
            height: 60px;
            border-radius: 50%;
            background: #fff;
            border: 2px solid #f7941e;
            cursor: pointer;
            box-shadow: 0 4px 12px rgba(0,0,0,0.15);
            z-index: 9998;
            transition: all 0.3s ease;
            padding: 0;
            display: flex;
            align-items: center;
            justify-content: center;
        }
        .ai-float-button.hidden {
            opacity: 0;
            transform: scale(0);
            pointer-events: none;
        }
        .ai-float-button-wrapper {
            width: 100%;
            height: 100%;
            border-radius: 50%;
            overflow: hidden;
        }
        .ai-float-button-wrapper img {
            width: 100%;
            height: 100%;
            object-fit: cover;
        }
        .ai-float-button-tooltip {
            position: absolute;
            left: -160px;
            top: 50%;
            transform: translateY(-50%);
            background: #333;
            color: #fff;
            padding: 6px 12px;
            border-radius: 4px;
            font-size: 13px;
            white-space: nowrap;
            opacity: 0;
            pointer-events: none;
            transition: opacity 0.3s ease;
        }
        .ai-float-button:hover .ai-float-button-tooltip {
            opacity: 1;
        }
        .ai-chat-modal {
            position: fixed;
            top: 0;
            left: 0;
            width: 100%;
            height: 100%;
            z-index: 99999;
            display: none;
        }
        .ai-chat-modal.active {
            display: block;
        }
        .ai-chat-modal-overlay {
            position: absolute;
            top: 0;
            left: 0;
            width: 100%;
            height: 100%;
            background: rgba(0,0,0,0.4);
        }
        .ai-chat-modal-container {
            position: absolute;
            bottom: 0;
            right: 0;
            width: 100%;
            height: 100%;
            background: #fff;
            display: flex;
            flex-direction: column;
            transition: transform 0.3s ease;
            transform: translateY(100%);
        }
        .ai-chat-modal.active .ai-chat-modal-container {
            transform: translateY(0);
        }
        .ai-chat-modal-header {
            background: #f7941e;
            color: #fff;
            padding: 15px;
            display: flex;
            justify-content: space-between;
            align-items: center;
        }
        .ai-chat-modal-header h3 {
            margin: 0;
            color: #fff;
            font-size: 16px;
        }
        .ai-chat-modal-header-actions button {
            background: none;
            border: none;
            color: #fff;
            font-size: 20px;
            cursor: pointer;
            margin-left: 10px;
        }
        .ai-chat-modal-body {
            flex: 1;
            overflow: hidden;
        }
        #ai-chat-iframe {
            width: 100%;
            height: 100%;
        }
        .ai-chat-expand { display: none; }
        /* Responsive Styles for Desktop */
        @media (min-width: 991px) {
            .ai-float-button {
                bottom: 30px;
                right: 30px;
                width: 70px;
                height: 70px;
            }
            .ai-chat-modal-container {
                bottom: 30px;
                right: 30px;
                width: 420px;
                height: 600px;
                border-radius: 8px;
                box-shadow: 0 5px 25px rgba(0,0,0,0.2);
                transform: translateX(120%);
            }
            .ai-chat-modal.active .ai-chat-modal-container {
                transform: translateX(0);
            }
            .ai-chat-expand { display: inline-block; }
            .ai-chat-modal-container.expanded {
                width: 80% !important;
                height: 85vh !important;
                top: 50%;
                left: 50%;
                transform: translate(-50%, -50%) !important;
            }
        }
    </style>
    <!-- 3. JAVASCRIPT INTERACTIONS -->
    <script>
        (function() {
            const floatButton = document.getElementById('ai-float-button');
            const modal = document.getElementById('ai-chat-modal');
            const overlay = document.getElementById('ai-chat-overlay');
            const closeButton = document.getElementById('ai-chat-close');
            const expandButton = document.getElementById('ai-chat-expand');
            const container = modal.querySelector('.ai-chat-modal-container');
            function openModal() {
                modal.classList.add('active');
                floatButton.classList.add('hidden');
            }
            function closeModal() {
                modal.classList.remove('active');
                container.classList.remove('expanded');
                floatButton.classList.remove('hidden');
                document.body.style.overflow = '';
            }
            function toggleExpand() {
                const isExpanded = container.classList.toggle('expanded');
                expandButton.innerHTML = isExpanded ? '⤡' : '⤢';
                document.body.style.overflow = isExpanded ? 'hidden' : '';
            }
            floatButton.addEventListener('click', openModal);
            closeButton.addEventListener('click', closeModal);
            expandButton.addEventListener('click', toggleExpand);
            overlay.addEventListener('click', function() {
                if (!container.classList.contains('expanded')) closeModal();
            });
            document.addEventListener('keydown', function(e) {
                if (e.key === 'Escape' && modal.classList.contains('active')) closeModal();
            });
        })();
    </script>
<?php
});
Save the modified functions.php file and drag it back to the server via FileZilla. When the target file exists prompt appears, select Overwrite and click OK.
Step 6 — Configure Content Security Policy (CSP) on the Chat Application
Crucial Requirement: Skipping this step will result in browsers blocking your iframe from loading due to anti-clickjacking security policies (frame-ancestors 'self').
Ask your Chatbot development team (or configure it yourself if you manage the app) to whitelist your WordPress domain in the Chat application's header configuration.
Example configuration for a next.config.ts file (if the Chat app is built with Next.js)
const nextConfig: NextConfig = {
 headers() {
   return [
     {
       source: "/:path*",
       headers: [
         {
           key: "Content-Security-Policy",
           // Replace https://your-wordpress-domain.com with your actual production WordPress domain
           value: "frame-ancestors 'self' https://your-wordpress-domain.com https://www.your-wordpress-domain.com;",
         },
       ],
     },
   ];
 },
};

export default nextConfig;
Make sure to redeploy the Chat application after making these changes.
Step 7 — Verification & Testing Checklist
Visit your WordPress website using a browser and test the following functionality:
On Desktop Screens
[ ] The circular avatar button is visible in the bottom-right corner.
[ ] Hovering over the avatar triggers a tooltip saying "Chat with AI Assistant".
[ ] Clicking the button slides out the chat window, and the iframe loads its content completely.
[ ] Sending a dummy text message triggers an appropriate AI response.
[ ] Clicking the expand button ⤢ centers and expands the UI, locking the background page scroll.
[ ] Clicking the closing cross × or hitting Esc minimizes the window, restoring the floating icon.
On Mobile Devices
[ ] The floating button scales nicely and doesn't cover up primary mobile navigation menus.
[ ] Tapping the icon slides the chatbot modal upward to fill the entire mobile screen view.
[ ] Inputs, typing behaviors, and text flows are clean and functional.
Troubleshooting Common WordPress Chatbot Issues
| Issue / Symptom | Likely Cause | Resolution / Next Step |
|---|---|---|
| Button does not appear anywhere | Custom CSS/JS conflict, script not loaded, or DOM element hidden | Revisit Step 3 to guarantee the WordPress theme core allows scripts injection at the bottom. |
| Redirect to display... in a frame error | Chat widget is being loaded inside an iframe with restricted policies | Complete Step 6. Make sure there are no typos in the domain name whitelisted inside the chat app config headers. |
| White Screen of Death (WSOD) on WordPress | PHP fatal error, plugin/theme conflict, or memory limit exceeded | Use FileZilla to locate your machine’s local functions.php backup created in Step 2. Revert it to functions.php, upload, and overwrite to revive the site. |
| Missing button image / 404 error | Incorrect image path or filename, or file not uploaded | Re-verify Step 4. Ensure the image filename matches exactly (lowercase vs uppercase letters matter on Unix servers). |
Missing wp_footer() hook execution inside coaster.php | wp_footer() is not being triggered (theme issue or incorrect file placement) | Revisit Step 3 to guarantee the WordPress theme core allows scripts injection at the bottom. |
CSP frame-ancestors block on the chatbot side | Chatbot app's CSP settings do not allow your WordPress domain to embed the chatbot | Complete Step 6. Make sure there are no typos in the domain name whitelisted inside the chat app config headers. |
Frequently Asked Questions
Can I embed any AI chatbot into WordPress?
Yes. As long as your chatbot is hosted as a standalone web application and can be accessed via a public URL, you can embed it into WordPress using an iframe. This approach works regardless of whether your chatbot is built with Next.js, React, Vue, Bubble, Voiceflow, or other web technologies.
Why is iframe better than a WordPress plugin?
An iframe-based approach keeps your AI chatbot completely independent from WordPress. This reduces plugin conflicts, simplifies maintenance, and allows your engineering team to update the chatbot without modifying your WordPress installation. It's a more scalable architecture for production environments.
Will embedding an iframe affect my website's SEO?
No. Search engines primarily index the content of your WordPress pages, not the content inside the embedded iframe. As long as the chatbot doesn't replace your primary page content, using an iframe has little to no impact on SEO.
Does this work with Elementor or other page builders?
Yes. Because the chatbot is injected through the wp_footer() hook, it works independently of page builders such as Elementor, Divi, Beaver Builder, or Gutenberg, as long as your active theme correctly implements the wp_footer() function.
Can I use this approach with WooCommerce?
Absolutely. Since the chatbot operates independently from WordPress, it works seamlessly with WooCommerce stores and can assist customers with product recommendations, FAQs, order inquiries, and customer support without interfering with your store's functionality.
Why is my iframe showing "Refused to display" or a blank page?
This usually indicates that the chatbot application blocks iframe embedding through its Content Security Policy (CSP) or X-Frame-Options headers. Make sure your chatbot server explicitly allows your WordPress domain in the frame-ancestors directive before redeploying the application.
Can I update my AI chatbot without changing my WordPress site?
Yes. Since the chatbot is deployed as a standalone application, you can update its UI, prompts, AI models, RAG pipeline, or backend services independently. Your WordPress website doesn't need to be redeployed.
Is this approach suitable for production websites?
Yes. Decoupling the chatbot from WordPress is a common architecture used in production environments because it improves maintainability, reduces operational risks, and allows frontend websites and AI applications to evolve independently.
Conclusion
By avoiding heavy plugins and keeping your AI chatbot isolated within a secure <iframe> architecture, you have successfully given your WordPress website a modern, high-performance upgrade. This setup ensures that your site stays incredibly lightweight while keeping your AI application highly maintainable. Whenever you need to update the bot's intelligence, model parameters, or conversation styles, you can now do so directly in your chat application without touching a single line of WordPress code again. Happy building!
Build a Production-Ready AI Chatbot
Need a custom AI chatbot for your business?
At Unchain Labs, we build production-ready AI assistants, RAG systems, enterprise copilots, and AI automation tailored to real business workflows.
👉 Talk to our team.
👉 Try our AI products:
• CAS – AI Sales Consultant
• Fair Clause – AI Contract Review Assistant


